Ebixio
Just another altruistic weblog
Home
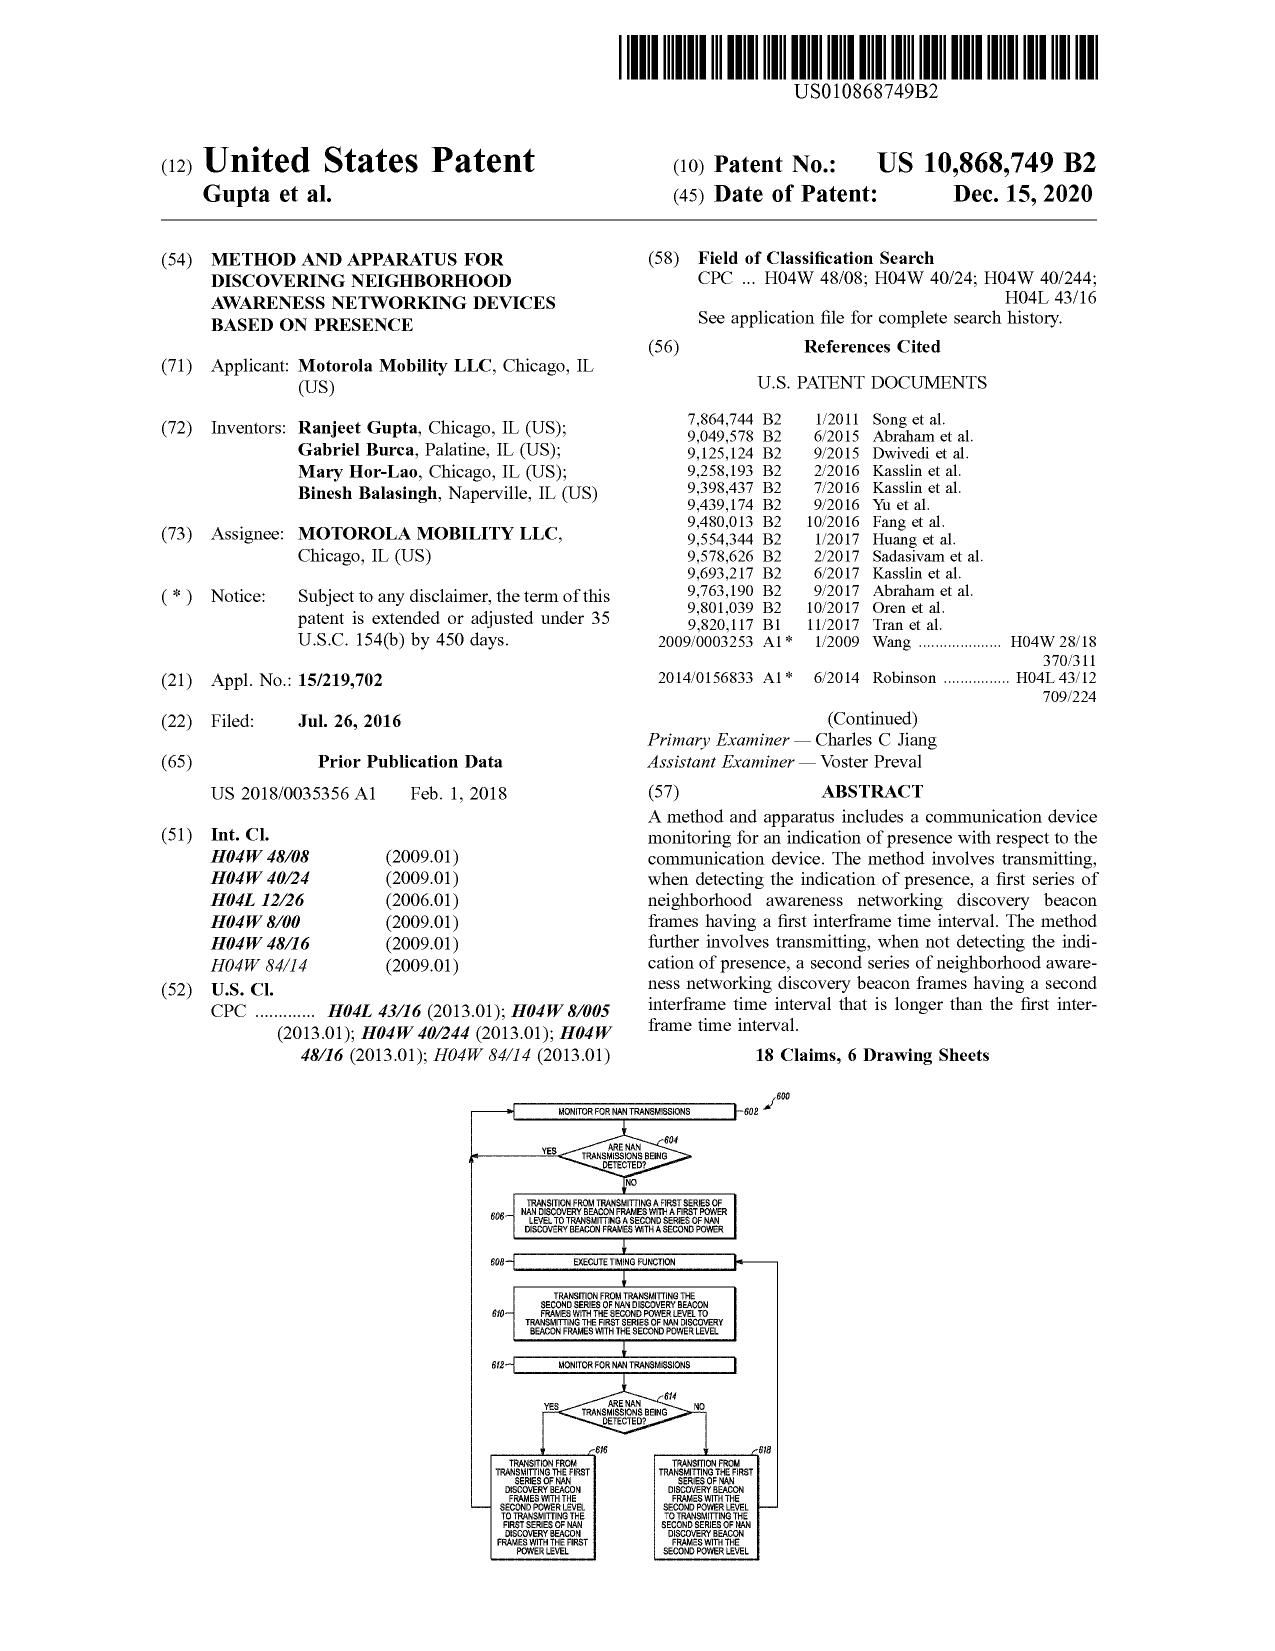
Method and Apparatus for Discovering Neighborhood Awareness Networking Devices Based on Presence
January 10th, 2021
Gabriel Burca
No comments
Full document:
US10868749B2
Download
Categories:
Uncategorized
Tags:
Method and Apparatus for Discovering Neighborhood Awareness Networking Devices Using a Surrogate Device
October 20th, 2019
Gabriel Burca
No comments
Full document:
US10341943B2
Download
Categories:
Uncategorized
Tags:
Patents
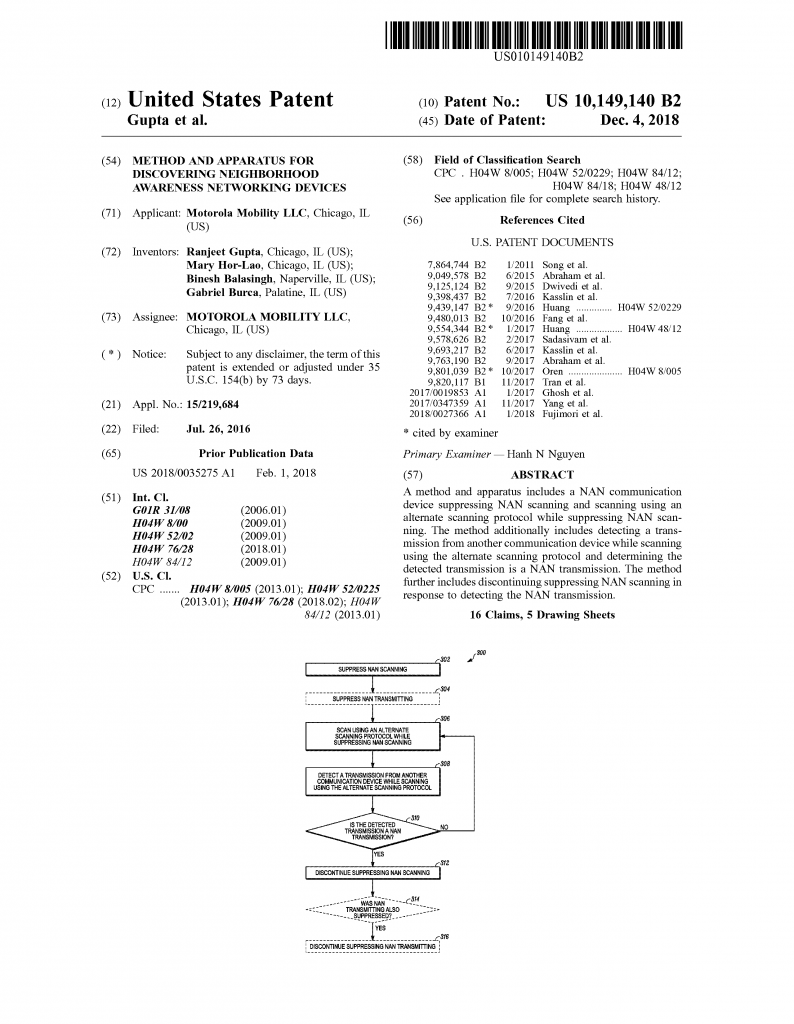
Method and Apparatus for Discovering Neighborhood Awareness Networking Devices
October 20th, 2019
Gabriel Burca
No comments
Full document:
US010149140B2
Download
Categories:
Uncategorized
Tags:
Patents
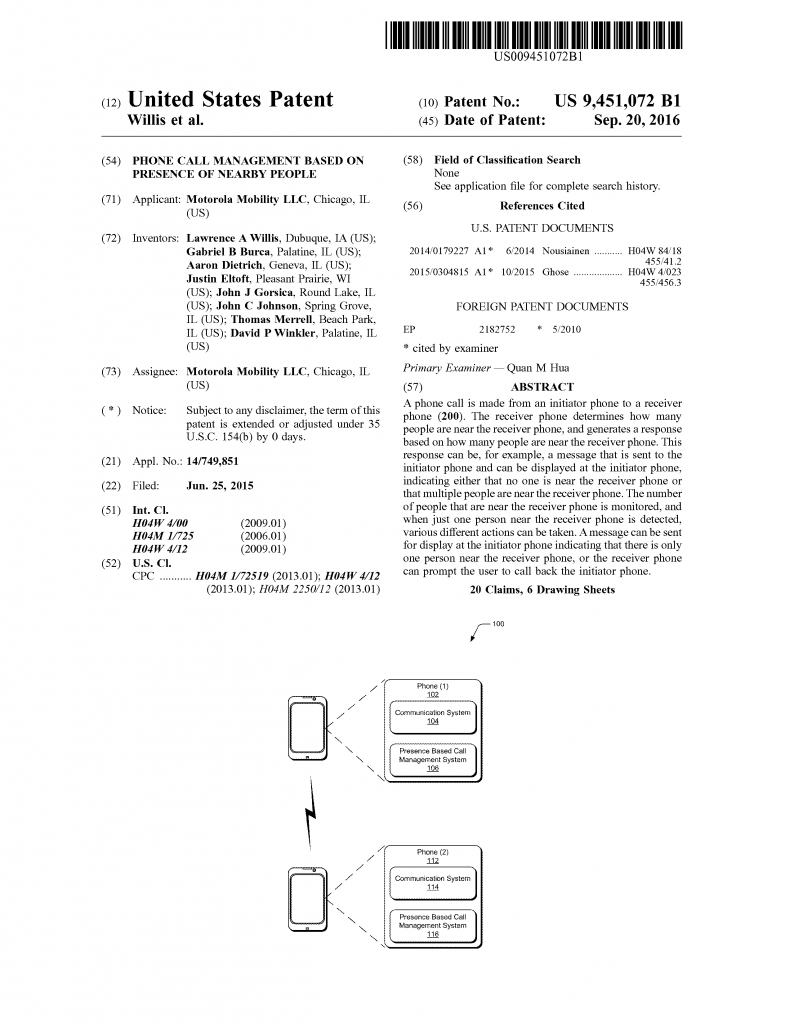
Phone Call Management Based on Presence of Nearby People
October 20th, 2019
Gabriel Burca
No comments
Full document:
US009451072
Download
Categories:
Uncategorized
Tags:
Patents
Low Power Management of Multiple Sensor Integrated Chip Architecture
October 20th, 2019
Gabriel Burca
No comments
Full document:
US009354722
Download
Categories:
Uncategorized
Tags:
Patents
Older Entries
RSS
Recent Posts
Method and Apparatus for Discovering Neighborhood Awareness Networking Devices Based on Presence
Method and Apparatus for Discovering Neighborhood Awareness Networking Devices Using a Surrogate Device
Method and Apparatus for Discovering Neighborhood Awareness Networking Devices
Phone Call Management Based on Presence of Nearby People
Low Power Management of Multiple Sensor Integrated Chip Architecture
Alternatives for clang
Import Tellico books into Calibre
Vim Syntax Highlighting for Firewall Logs
Monitoring files with vim
DigiKam 4.10 on Ubuntu 14.04
Temperature sensor: TMP36, DHT22, and 10K Thermistor
Tig Quick Reference Card
From Acceleration to Displacement (part 2)
From Acceleration to Displacement
Git – deleting the current branch is denied
Using Android IPC binders from native code
Editing GEDCOM files with vim
Git Quick Reference Card
How to make wpa_cli talk to wpa_supplicant in Ubuntu
Smart backup for your GMail account
The Android IPC system
Windows proxy control script
CygWin terminal colors
X11 remote display
How to enable JavaScript in MediaTomb on Ubuntu
How to install libjs (SpiderMonkey)
Tunneling ssh – option 2
Tunneling ssh – option 1
Tunneling ssh over an http proxy
Adding arbitrary files to WordPress Media Library
Categories
Uncategorized
Blogroll
VirtMus
Archives
January 2021
October 2019
October 2016
April 2016
January 2016
November 2015
May 2015
January 2014
November 2013
June 2013
May 2013
August 2012
July 2012
March 2012
September 2011
May 2011
January 2011
December 2010
November 2010
October 2010
August 2010
July 2010
February 2010
December 2009
November 2009
October 2009
September 2009
Meta
Log in